Estimated time to commission and connect: Less than 8 minutes
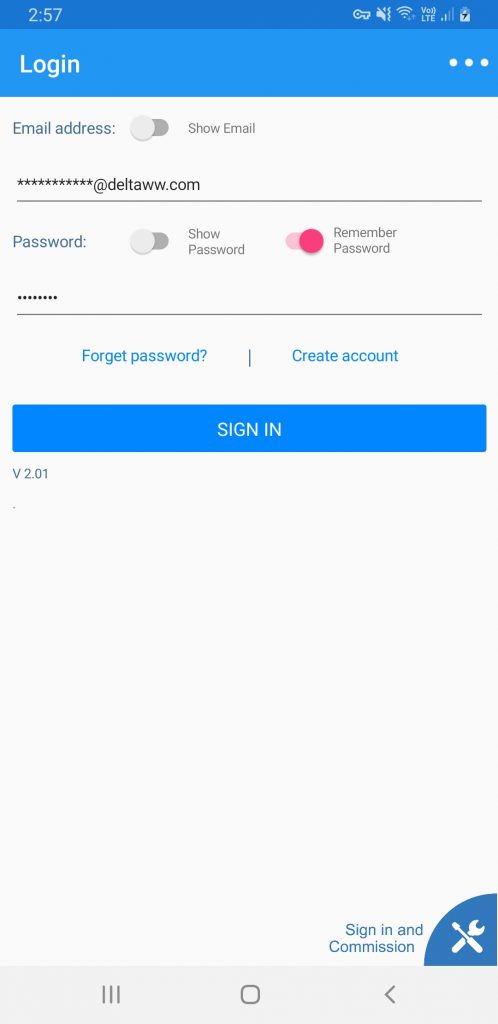
- Step 1. Type in your installer email address and password.
- Step 2. Press Sign-in and Commission (bottom right button)
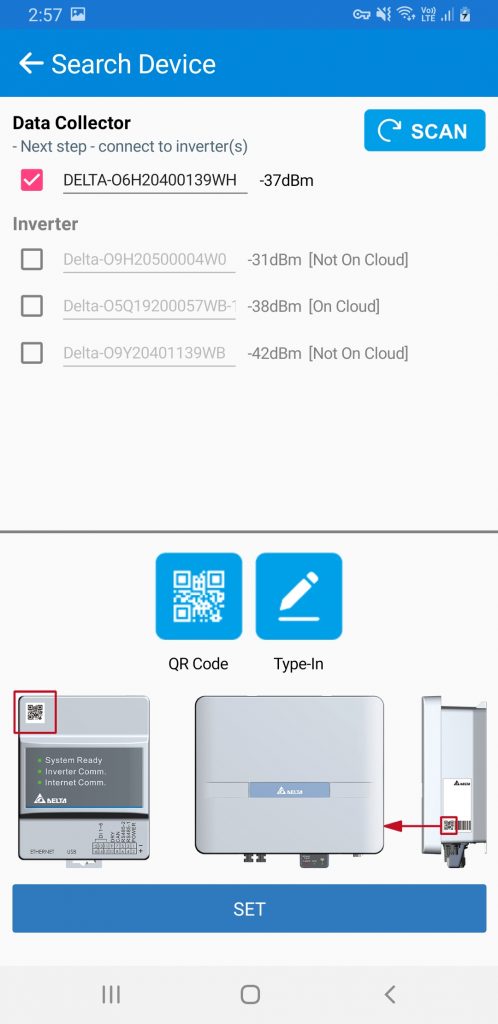
Step 3. Select the Data Collector to be commissioned.
Note: If the Wi-Fi isn’t showing up hit the scan button at the top right to refresh.
Note: Take note of the -XX dBm listed next to each Wi-Fi signal, -30dBm is stronger than -70dBm. Ensure it is at least -70dBm.
Note: You do not need to use the QR code scanner or “Type-in” button. This is only if you are unable to scan for the devices. This is used for IOS phones which cannot scan for local Wi-Fi networks.
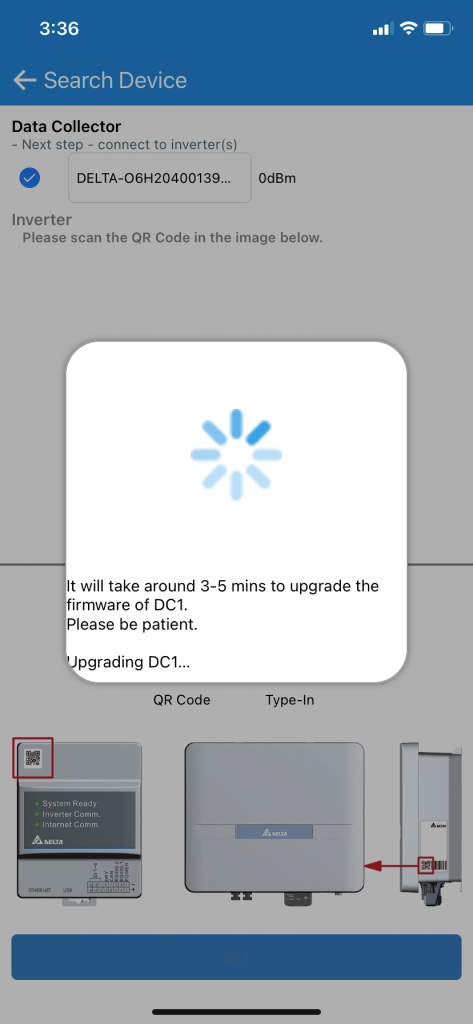
- Note: The APP may request you to update the DC1, if it does you will have the option to use the firmware built into the APP by pressing “NO” or press “YES” to download the latest firmware. Currently there is no need to download the latest, please use the firmware built into the APP for your convenience by pressing “NO”.
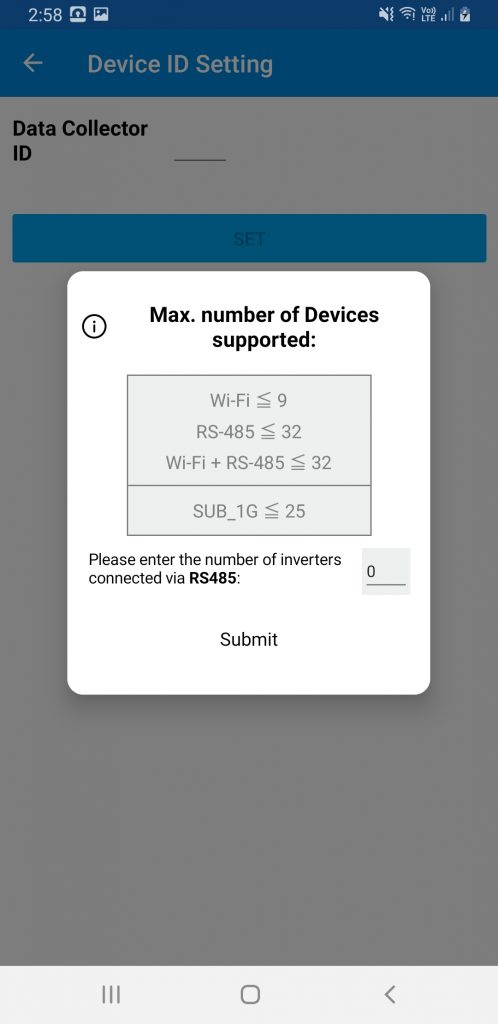
- Step 5. Type in the number of inverters you have connected the DC1 to via RS-485. If you are using a battery this is an option. However if you are just using Wi-Fi inverters please type in “0” and hit “Submit”.
- Note: If you are using a single phase or three phase meter connected to the DC1, please still type in 0. The meter selection is separate to the inverter selection.
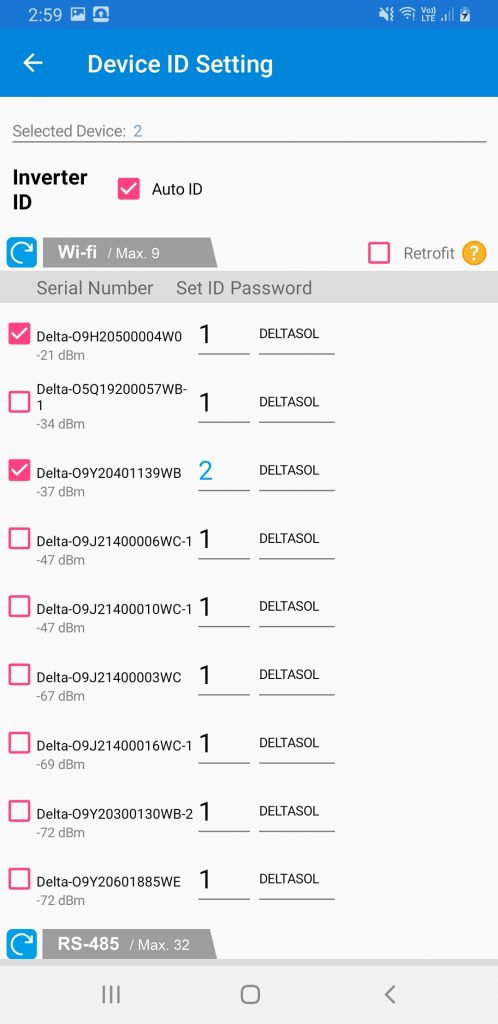
- Step 6. You will see a list of Wi-Fi devices that are scanned by the DC1. Please select the Delta Wi-Fi inverters that you are monitoring/controlling with the DC1 by pressing the tickbox on the left. If there are multiple please remember to press the “auto” button to automatically allocate ID’s to those devices.
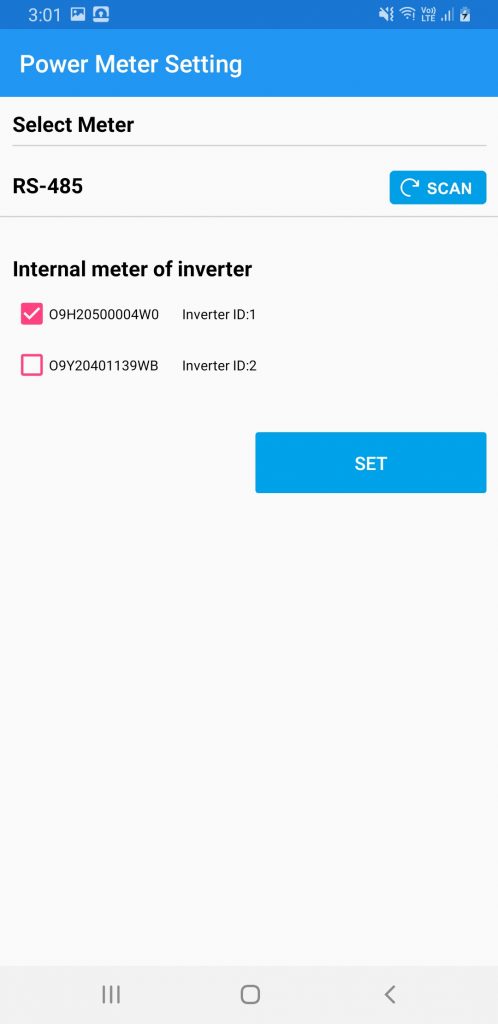
- Step 7. Meter selection, the setup will require at one meter to perform consumption monitoring/Self-consumption operation and/or export control. Please select the internal meter or external meter that you wish to use.
- Note: Only one meter can be selected. The H5A_222 and BX6.3 both have internal meters built-in. Please select the internal meter that you have installed a CT with. RS-485 meters consist of Delta’s P1E (single phase meter) and P3E (3 phase meter).
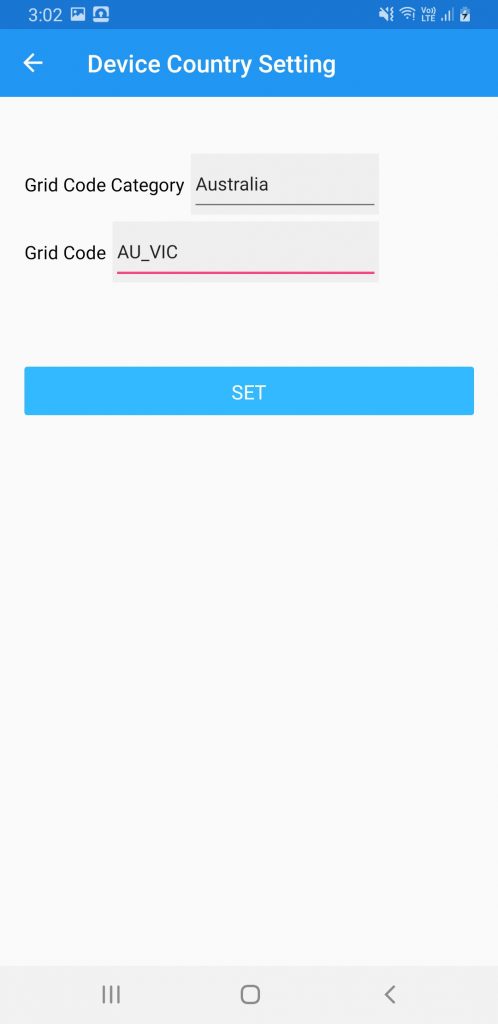
- Step 8. Select the country and Select the Grid code. Press “SET” to continue. This will set all devices connected to the DC1 to the desired country setting.
- Note: The Grid code selection list has multiple DNSP’s in Australia. When selected these will have settings tailored to their technical specifications.
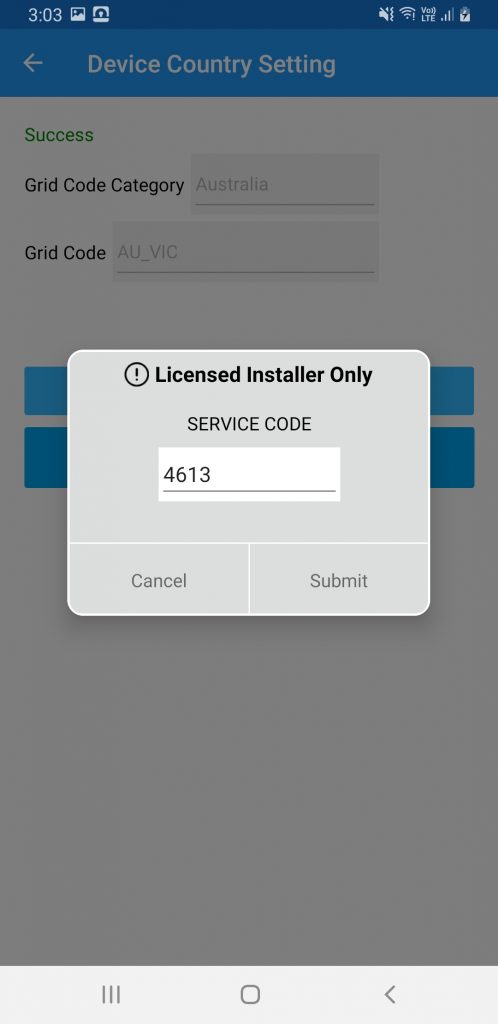
- Note: After pressing “SET” you will notice there is an advanced tab. Press “NEXT” to continue. To see what is inside the advanced tab see next image.
- Note: Type in the service code: 4613 to access the advanced tab.
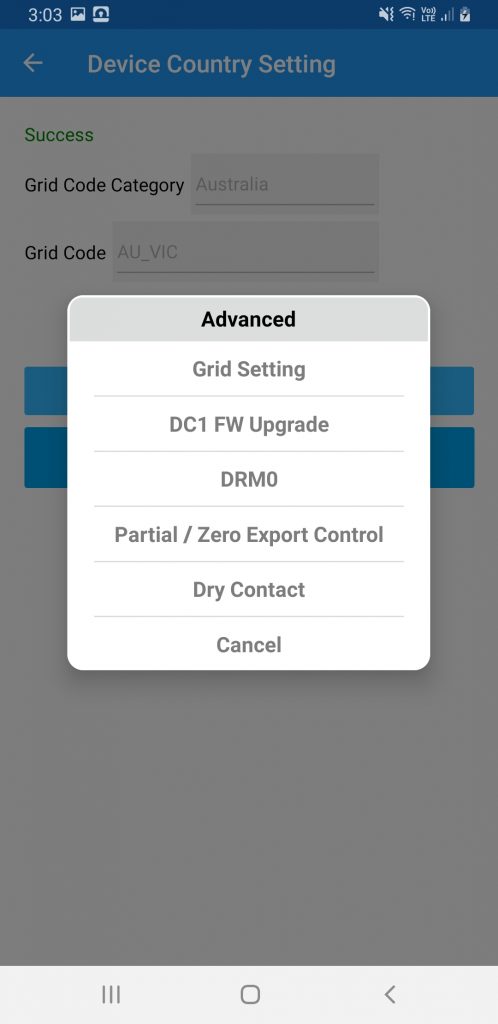
- Note: You are able to specifically adjust grid settings, dry contact and DRM in the advanced tab. When commissioning with a Delta Solar inverter more options will appear such as export control. All of these options can be accessed at a later stage.
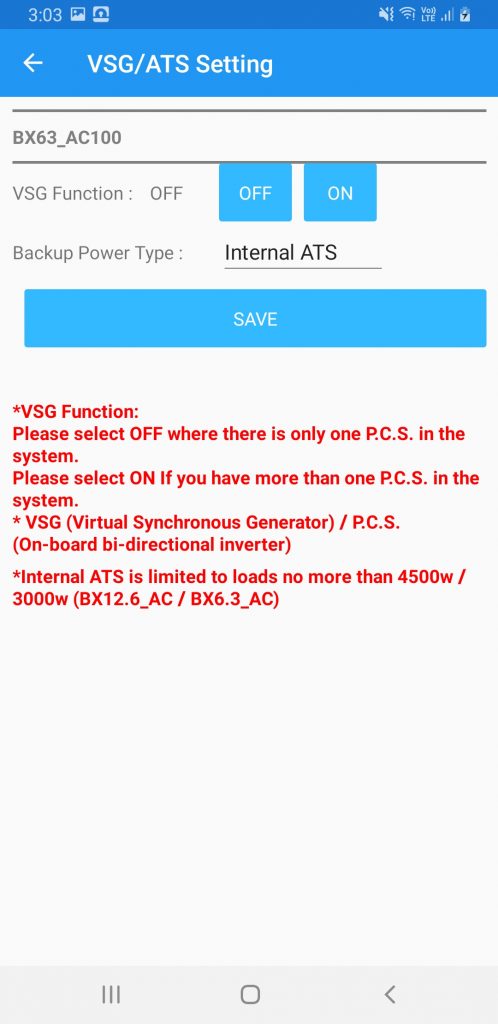
- Step 9. After pressing “NEXT you will be taken to the VSG/ATS Settings.
- VSG Function: OFF/ON –
- Turn “ON” for Application 5 Use Only (multiple BX6.3)
- Turn “OFF” for all other applications
- Backup Power Type: Internal ATS/External ATS.
- Internal ATS: Application 1, 2 and 3.
- External ATS: Application 4 and 5.
- To see how these applications are configured please see the manual: https://support.delta-es.com.au/wp-con…
- Once the correct options have been selected press “SAVE” if you only have 1x Battery then press “NEXT”.
- If you have multiple BX6.3 master batteries press “MULTIPLE SET” to set all ID’s to those settings. Then press “NEXT”.
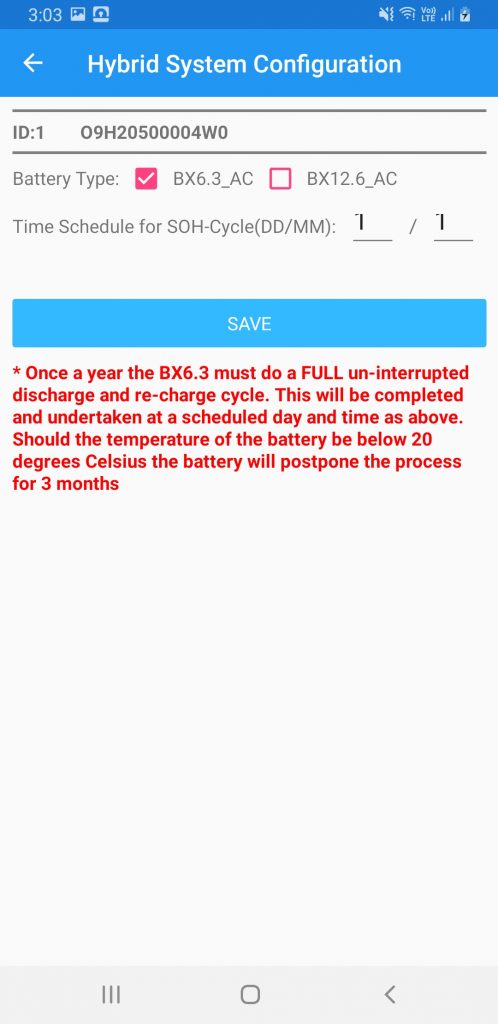
- Step 10. Battery Configuration
- Selecting your battery type:
- If you have a BX6.3 (master battery) please select BX6.3 as the battery type. If you have a BX6.3 and an EX (extension slave battery ~half the size of the BX6.3) then please select BX12.6.
- Select the time schedule for the SOH cycle, as mentioned in the red text below the “SAVE” button it will cycle the battery once a year.
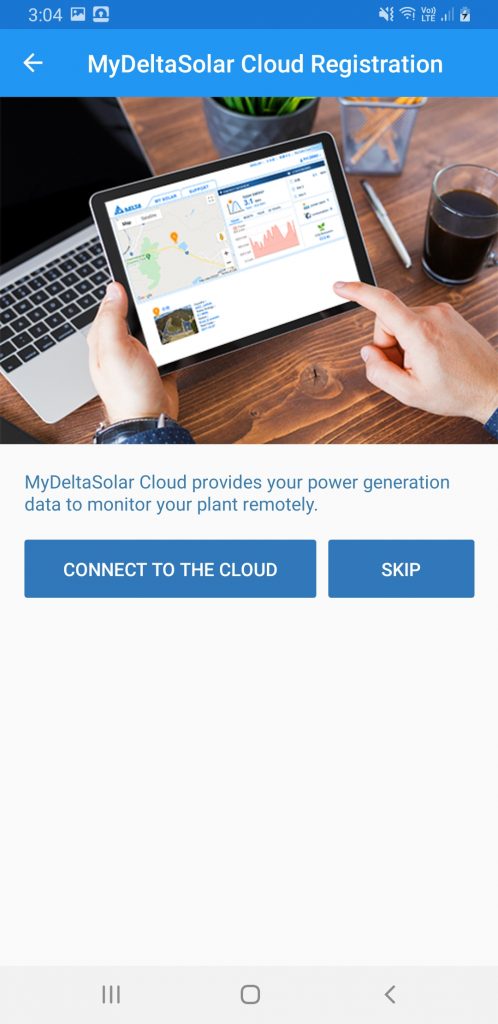
- Step 11. Choose to connect the DC1 to the cloud to monitor all your devices. Or skip to finalize the setup.
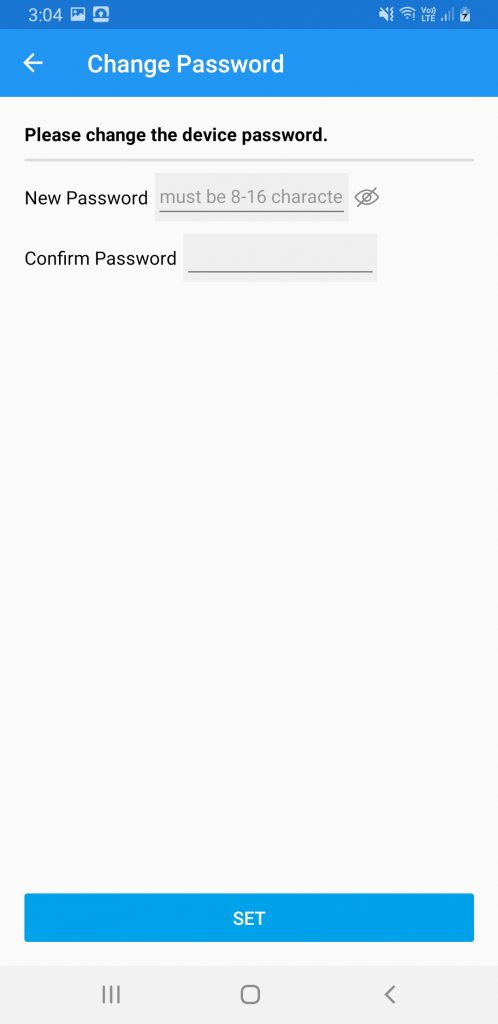
- Step 12. Change the password of the inverter to a desired password.
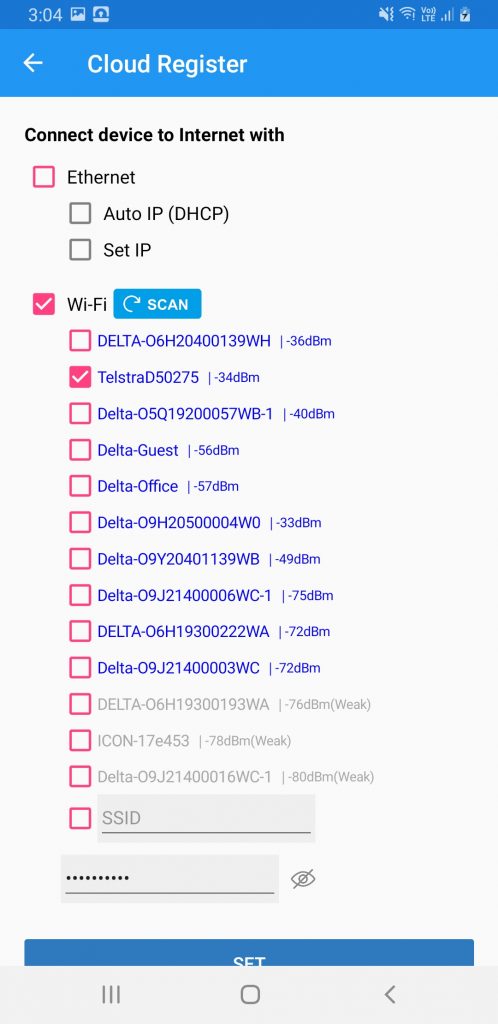
- Step 13. Select Wi-Fi tickbox. Then select the end-customers home Wi-Fi router SSID (Wi-Fi Name). Type in the password of the router.
- Then press “SET”
- Note: If the end-customers Wi-Fi did not show up press the scan button again.
- Note: See the – XX dBm next to the Wi-Fi router. If the signal strength is weaker than -70dBm the connection may not be stable enough for connection.
- Note: You also have the option to type in an SSID if the Wi-Fi signal cannot be scanned.
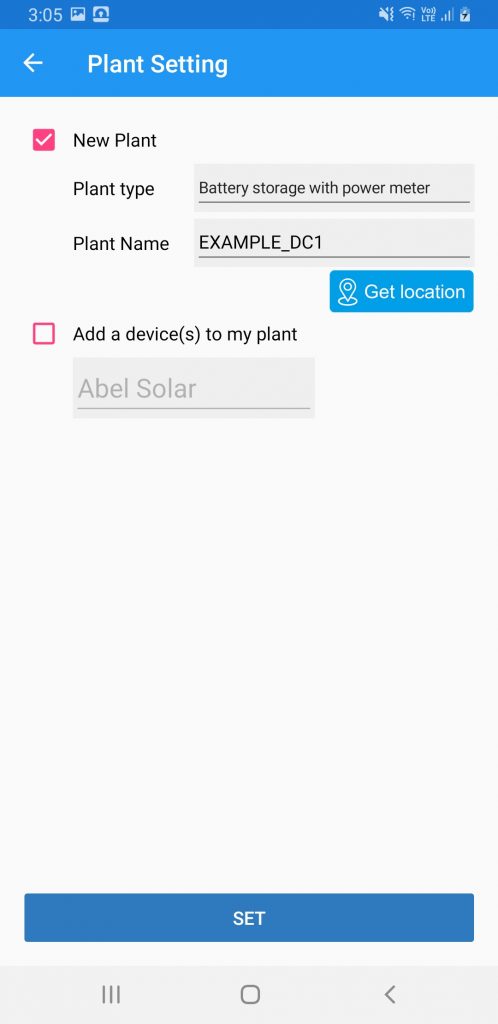
- Step 14. Select “New Plant”, select a plant type and type in a plant name.
- Note: The plant name must be unique.
- Note: You can the “Add device to my plant” is when you are adding another Delta device to an existing plant. You cannot do this with a DC1.
- Note: Plant Type Selection
- -Feed-in Without Power meter: H5A_222 without CT clamp
- -Feed-in With Power meter: H5A_222 with CT clamp
- -Battery storage with Power meter: Delta AC Coupled battery (BX6.3/BX12.6) with/without Inverter. CT clamp must be attached to BX6.3.
- Step 15. Click “Assign to” and type in the end-customers email address to share the plant to them.
- Note: This will allow you to fleet monitor all the plants you set up and the end customer will be able to see there own solar monitoring. If the end customer does not have an email you can still write there email in and it will prompt them to create an account. The plant will be shared to them as soon as they make an account.
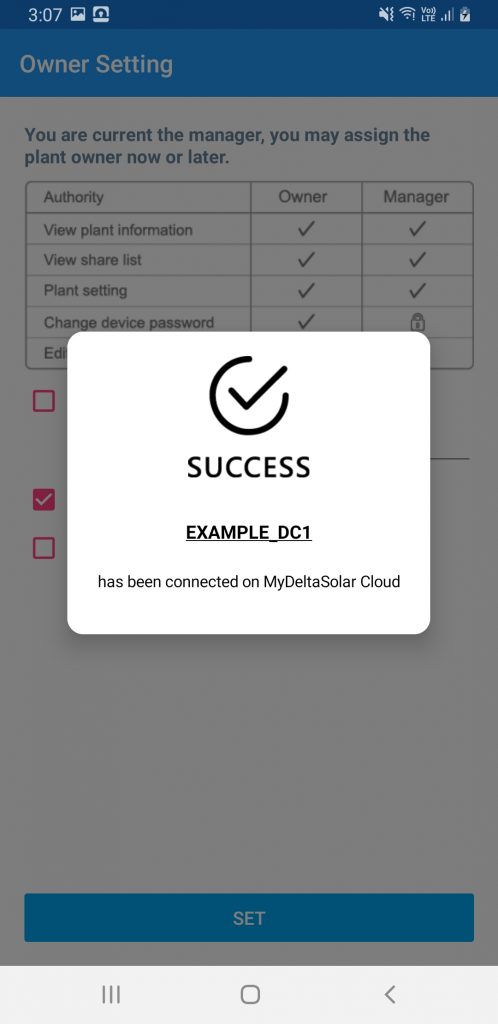
- Note: When the setup is completed you will see the success message show up.
Congratulations, you have setup your Delta device(s)!