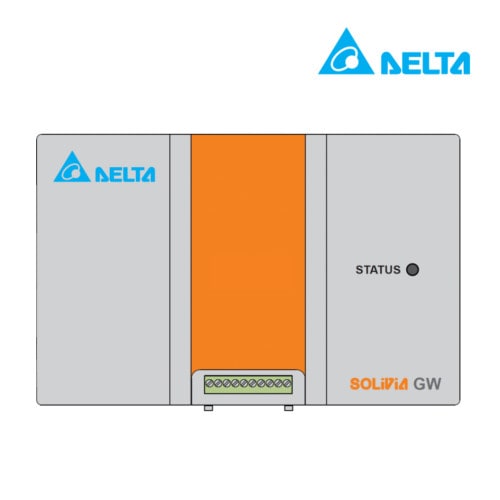
The Solivia Gateway provides a link between your Delta Solar Inverter and the internet, allowing you to view your production data online, all around the world.
The Gateway set up can be divided into two sections, the cloud set up and installation.
Cloud Set Up
- Create an account in the cloud.
- Go to http://monitoring.solar-inverter.com and register a new account or log in if you already have one. Ensure you write your email correctly as it will be your username.
- Check your email inbox (including junk) and click on the link provided to activate the account.
Installers: You can monitor all your customers with a single installer account. To obtain one, please create a standard account (steps below) and request installer status by emailing solarsupport@deltaww.com with your details.
- Set up a PV system in the web portal.
This step involves providing information about the size, location and other details of the system in order to provide accurate monitoring information.Once you are logged in, go to Manage PV systems and Enter new PV system. Please fill out all the details for accurate data. (Coordinates can be found on http://www.mapcoordinates.net)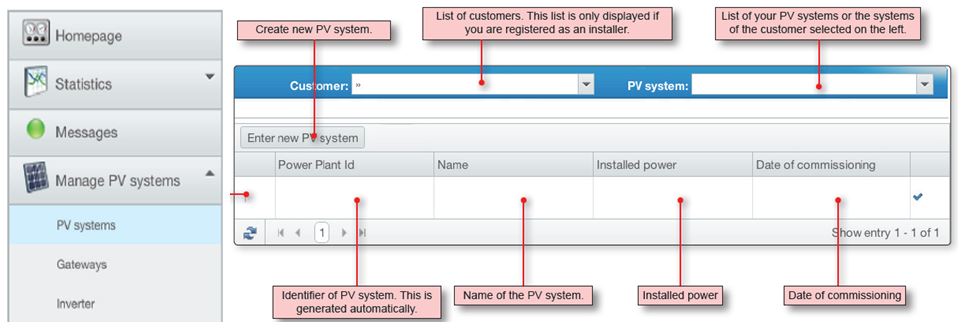
- Allocate Gateway device to PV system.
Here we inform the website where the information will be coming from by specifying the gateway Mac address. This can be found in the white label on the gateway.Go to Gateways under Manage PV systems and enter the required information. You will need to assign the recently created system to the new gateway.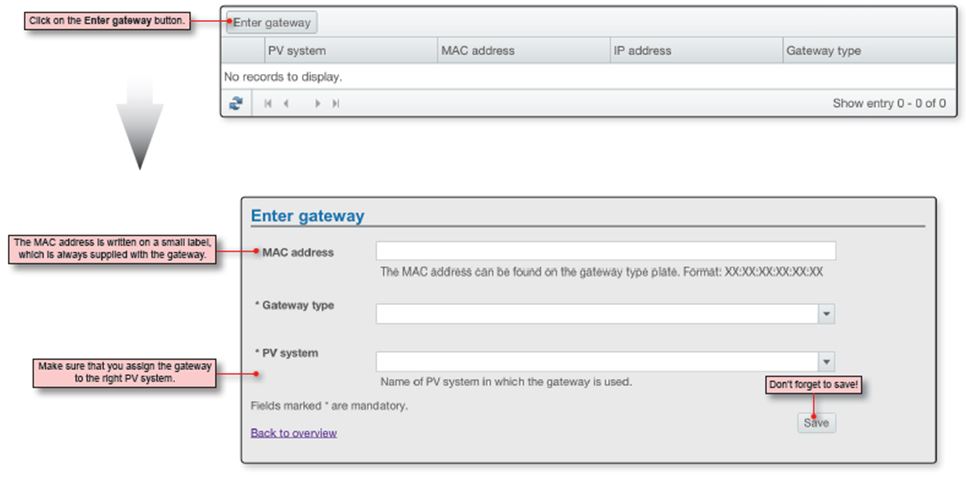
- If you are a customer, you have completed the cloud set up.
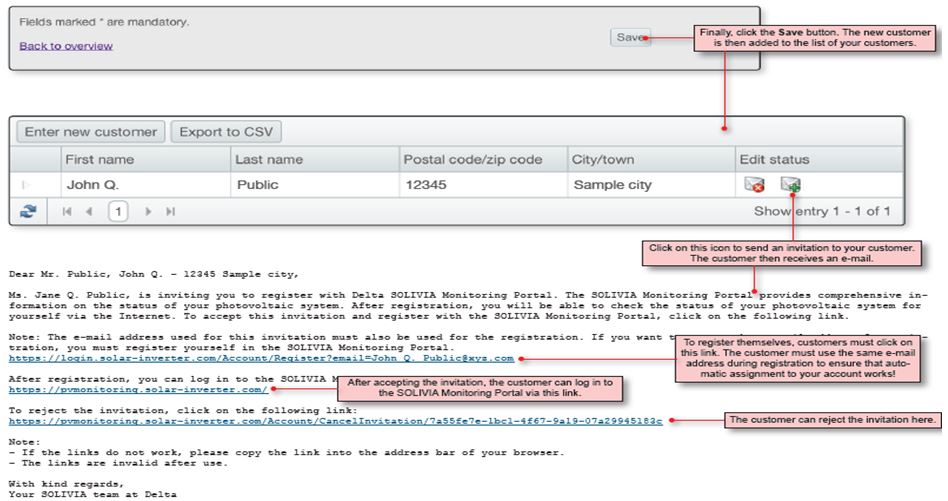
The inverter information will be automatically filled once the cloud receives data from the gateway. - Installers only: Invite the customer to see their specific PV system.
They will need to create their own account.
Please select Manage Customers and Enter new customer. Fill out the requested information, save the details and send an invitation to the customer by clicking in the green + envelope icon.The customer needs to check their email (including junk inbox) and click on the link provided.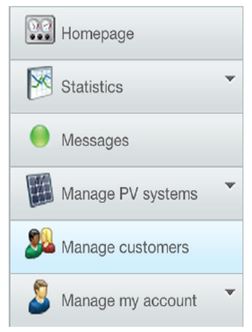
Hardware Set Up
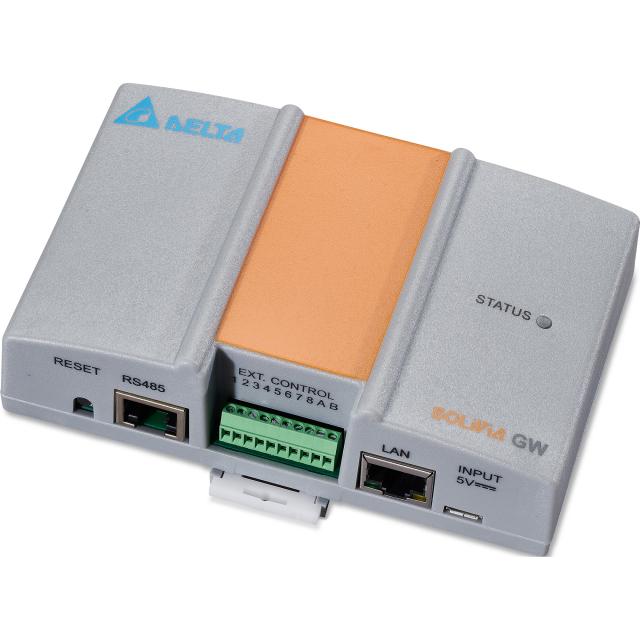
- Wiring.
Connecting your Gatway is very easy. Using standard Cat 5 cables you can connect the inverter to the gateway and the gateway to the home router using the standard ethernet heads.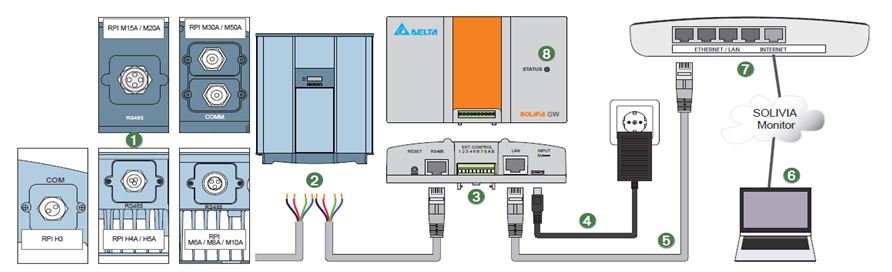
At the inverter end, the connection is done viaa terminal block. Just identify pin 7(Data +) and pin 8(Data -) and connect them to the respective ports in the inverter card. They generally are white-brown (7) and brown(8).
Cable pin 7 (+) à Port 3 or 5 (Positive +)
Cable pin 8 (-) à Port 4 or 6 (Negative -)If you are chaining multiple inverters, ensure the red termial resistor is ON in the last inverter.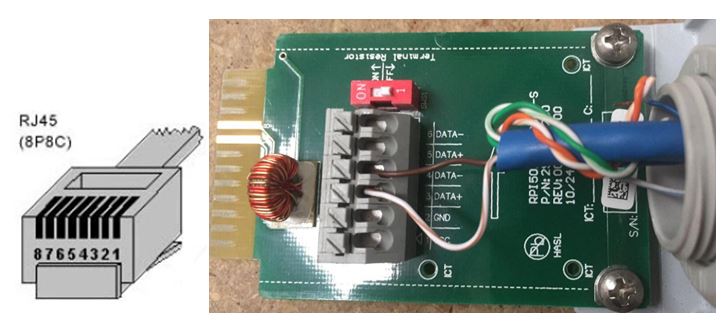
- Gateway Update.
Now that everything is set up and connected to the internet, connect to the local network (ie: router’s wifi).
Download the IP finder app to connect to the gateway CLICK HERE or go to the downloads tab.
Install the program and update the firmware following the steps below.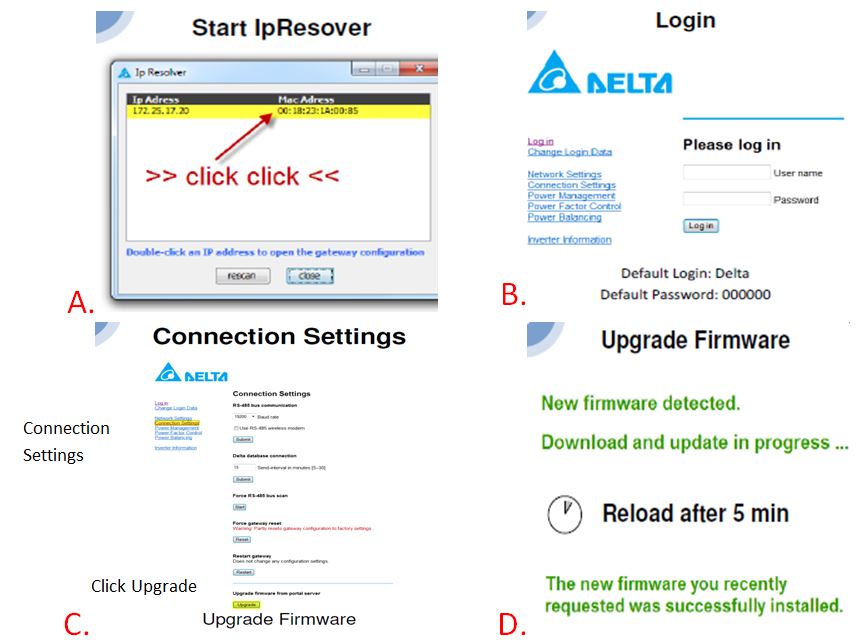
- Communication Check.
Now that everything is set up, the last set is to check that the gateway sees the inverter and the Portal.
Go to inverter information and ensure that the inverter information is displayed and the state of the portal is Connected.
You have completed the Gateway installation and set up.
If you need to connect multiple inverters, you can find a daisy chain guide at:
Connecting to multiple Delta inverters
You can access the production details anytime by logging into your account.
Please follow the link: http://monitoring.solar-inverter.com
Compatibility
RPI
- RPI H3
- RPI H3A
- RPI H4A
- RPI H5A
- RPI M6A
- RPI M10A
- RPI M15A
- RPI M20A
- RPI M30A
Solivia
- Solivia 2.5
- Solivia 3.0
- Solivia 3.3
- Solivia 5.0
- Solivia 15
- Solivia 20